Accessibility for UIKit
접근성 관련해서 잘 지원해주는 플랫폼 중 하나는 애플이다. 아래는 애플의 접근성 관련 설명 페이지
https://developer.apple.com/documentation/uikit/accessibility_for_uikit
Supporting VoiceOver in Your App
여러 접근성 중 보이스오버가 가장 많이 적용하는 것 중 하나일 것이다. 아래 페이지는 애플 가이드 페이지
- The accessibilityLabel property provides descriptive text that VoiceOver reads when the user selects an element.
- The accessibilityHint property provides additional context (or actions) for the selected element.
Accessibility for iOS Developer Guide
iOS 접근성 관련해서 정말 잘 설명되어있는 가이드 페이지!
https://a11y-guidelines.orange.com/en/mobile/ios/development/
iOS developer guide - Orange digital accessibility guidelines
VoiceOver must vocalize every informative element with a high degree of quality in order to let the user know and perfectly understand the context of the consulted page. The accuracy of this vocalization is done through four attributes: label, hint, value
a11y-guidelines.orange.com
Raywenderlich의 Accessibility 가이드 페이지
https://www.raywenderlich.com/6827616-ios-accessibility-getting-started
iOS Accessibility: Getting Started
In this iOS accessibility tutorial, learn how to make apps more accessible using VoiceOver and the Accessibility inspector.
www.raywenderlich.com
https://www.raywenderlich.com/4720178-ios-accessibility-tutorial-making-custom-controls-accessible
iOS Accessibility Tutorial: Making Custom Controls Accessible
In this iOS accessibility tutorial, you’ll learn to make custom controls accessible using VoiceOver, elements group, custom action, traits, frame and more.
www.raywenderlich.com
시뮬레이터에서 접근성 테스트 방법
XCode > Open Developer Tool > Accessibility Insepector
'iOS > iOS 본질을 파헤치쟈' 카테고리의 다른 글
| [iOS] UNUserNotificationCenter, Push Notification 권한 요청 방법 (0) | 2021.07.06 |
|---|---|
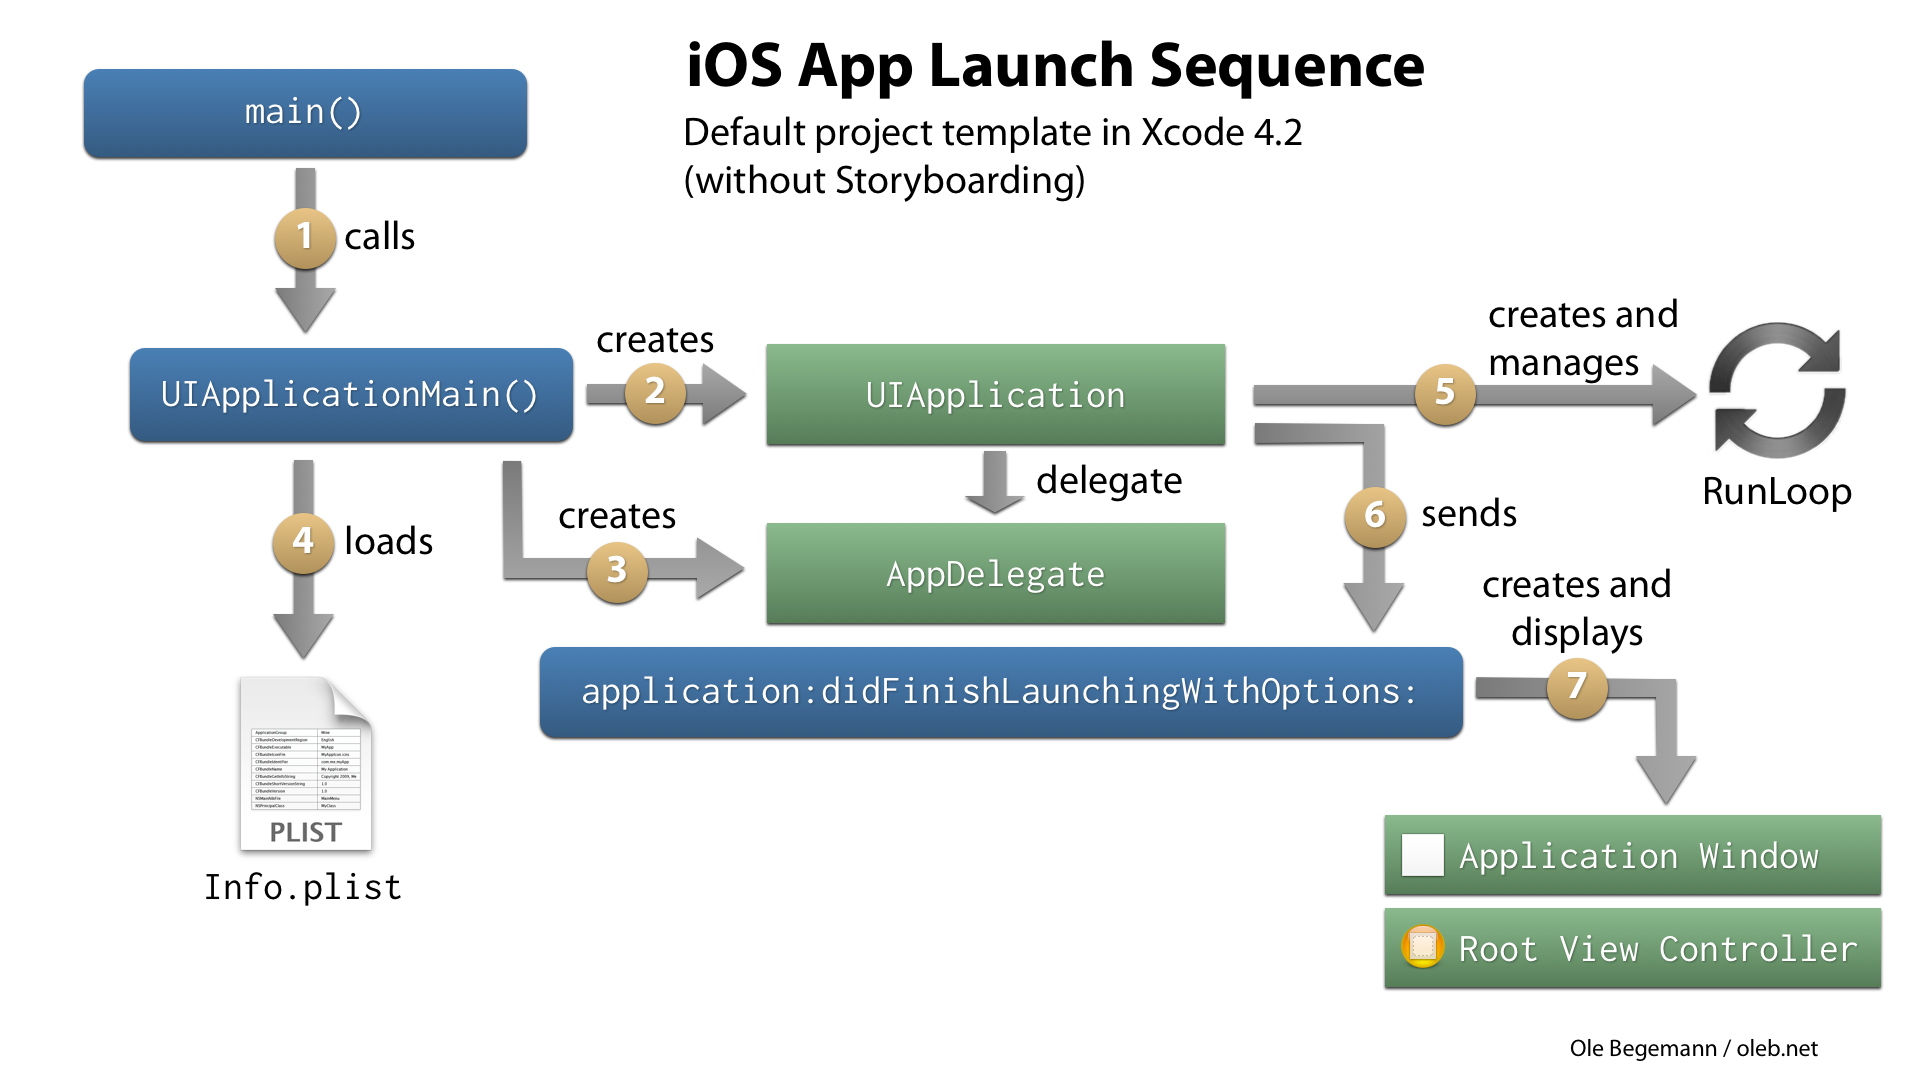
| [iOS] iOS 애플리케이션 실행 순서, UIApplicationMain, @main (0) | 2021.07.06 |
| [iOS] Autolayout Engine 동작 방식 (0) | 2019.12.09 |